
DIY Drying Racks - How to Build a Drying Rack for Food Preservation
 My friend Patric is a regular Mr. Fix-It. He taught me how to use an electric drill and build raised beds when I first starting my gardening business. He also happens to be a restaurateur, and his first restau- rant was this beautiful Italian place that he practically built by hand. One afternoon, I was in the basement where all the prep tables are for the kitchen. Behind the table where cooks were filling ravioli was an entire rack of screens used for drying the pasta. I took one look at them and immediately thought they would make awesome drying racks for leaves and seeds.
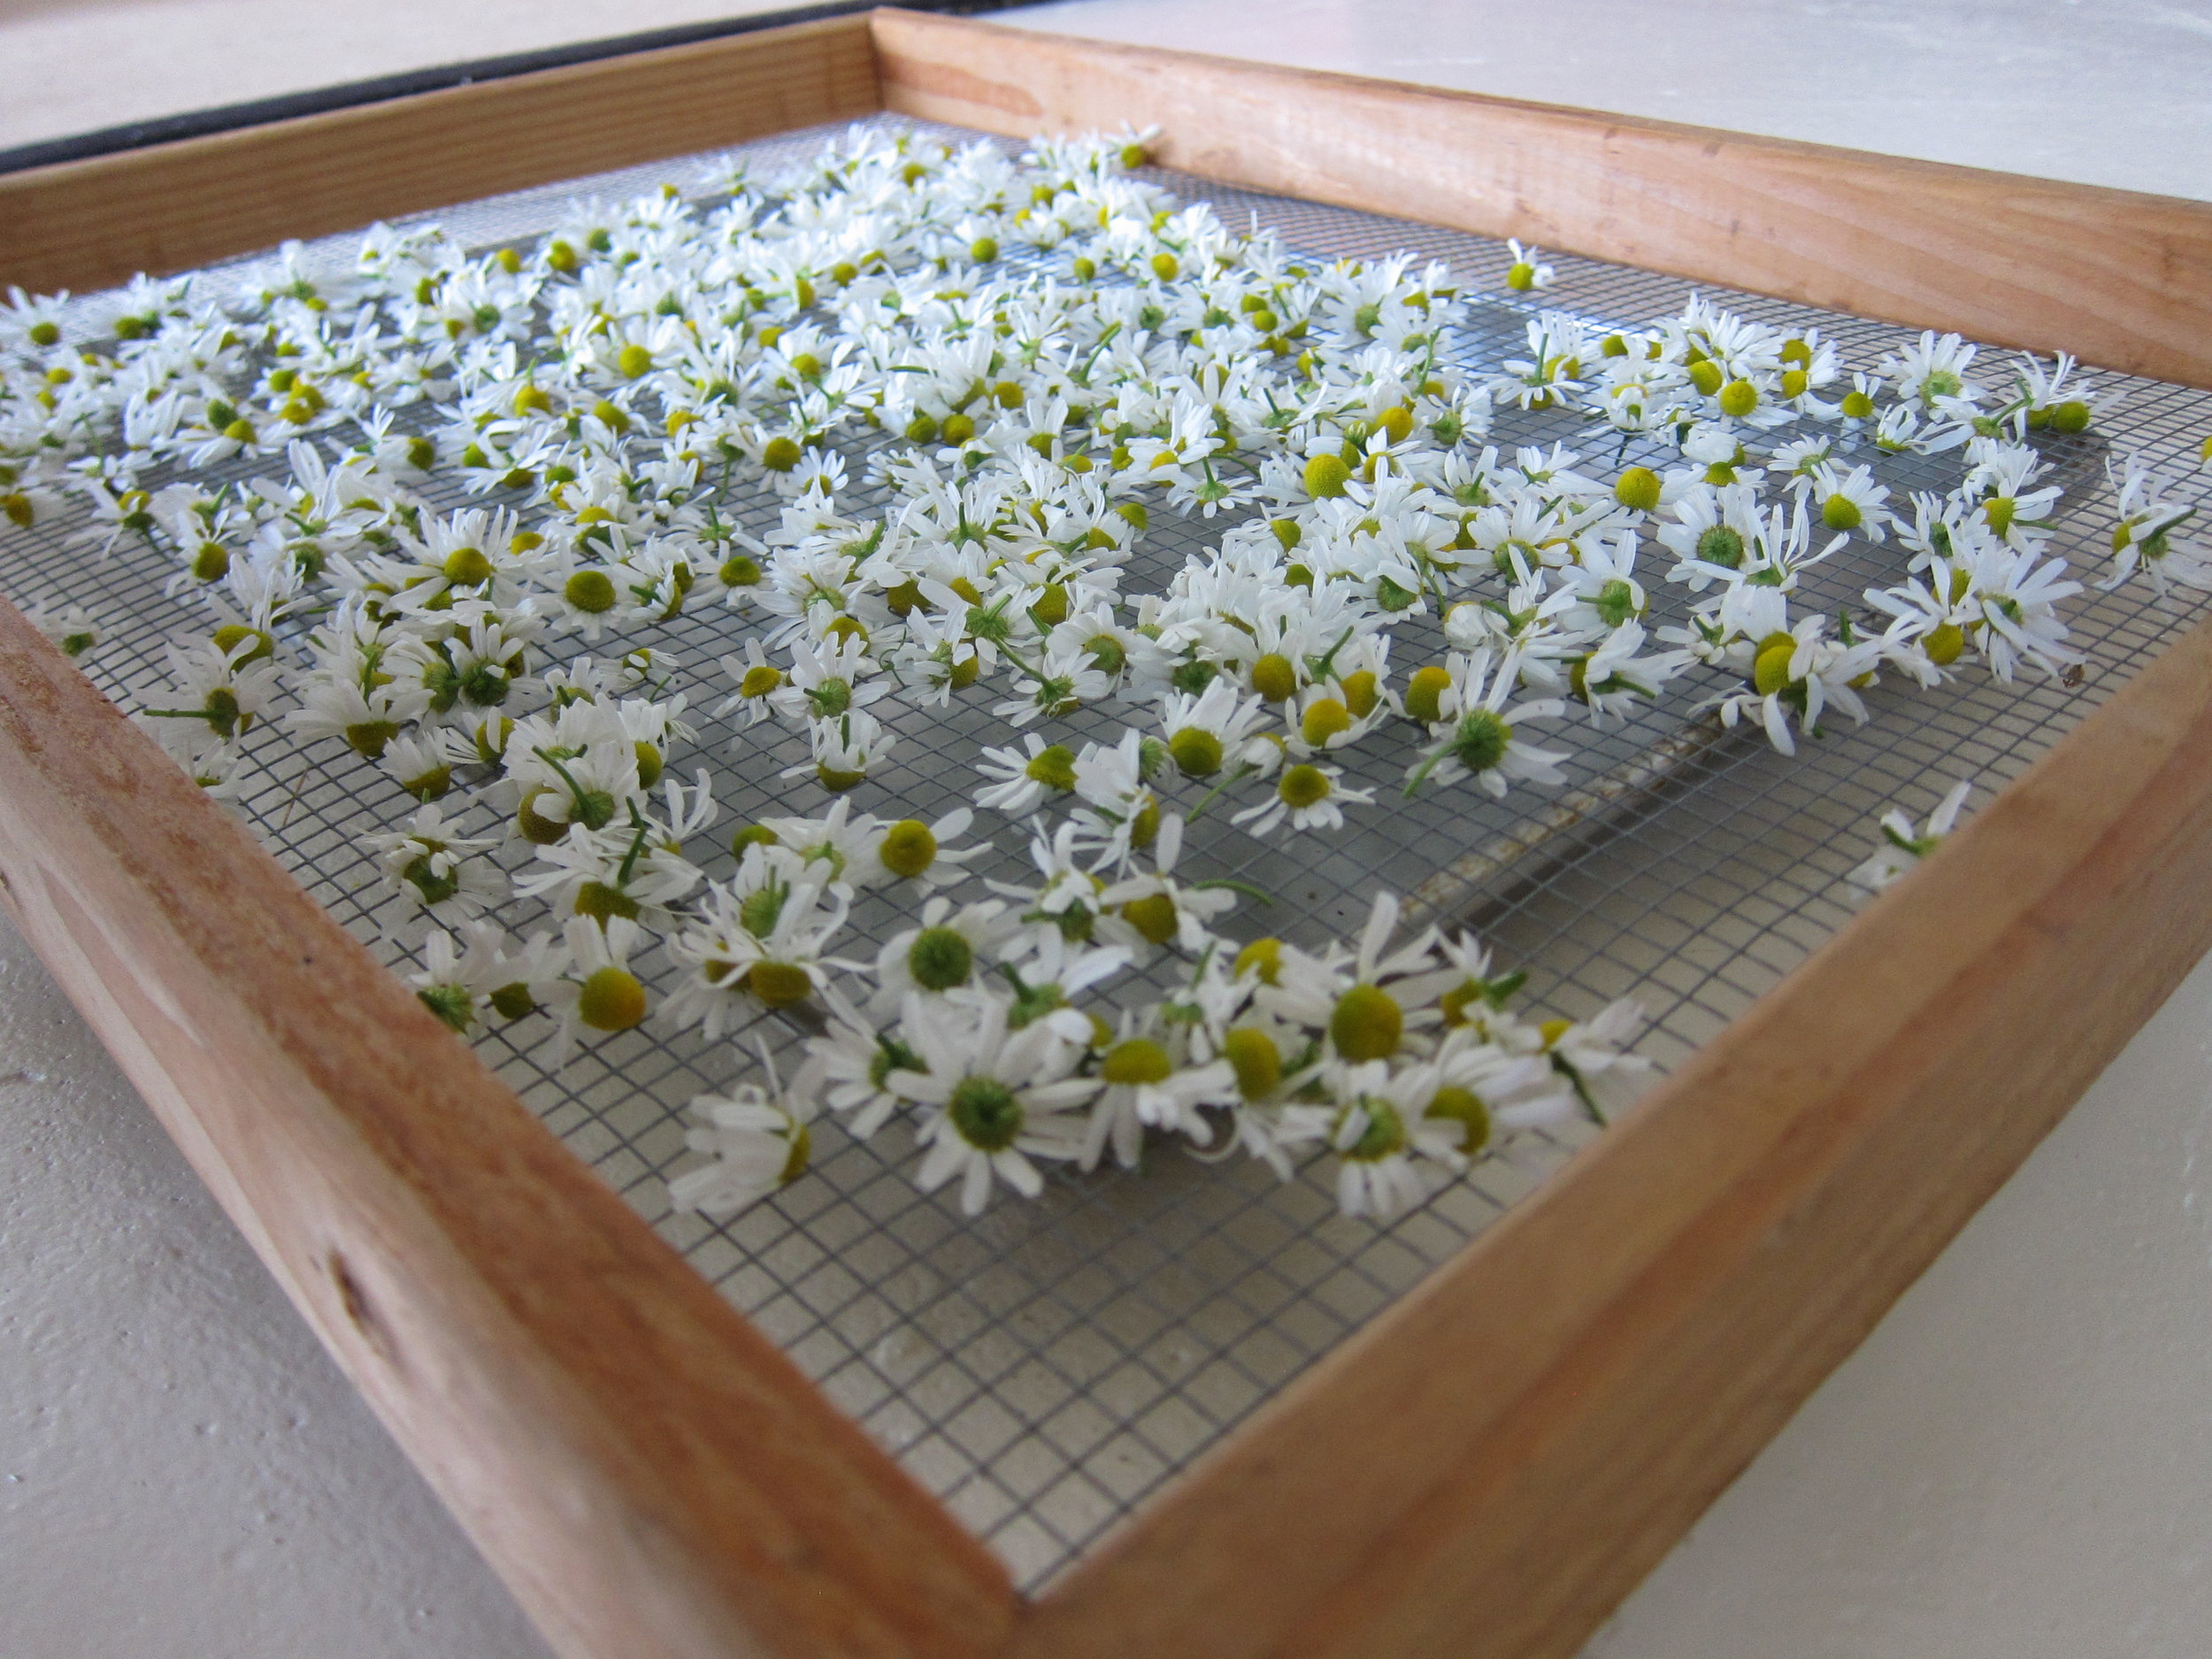
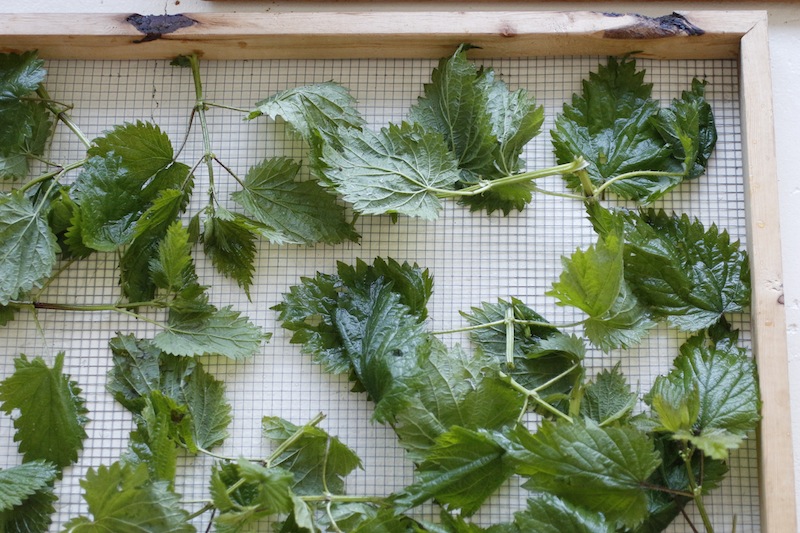
Drying out herbs and seeds is a fairly easy process, but it takes time and is more successful when you use drying racks. Air circu- lates around all sides of the plant, so they dry out faster and more evenly. Handmade drying racks can also be used for drying out tomatoes or fruits. And in the winter, you can use racks for laying out handmade pasta.
Although Patric made me my first set of racks, they are quite simple to make, and you can gather most materials from a quick trip to the hardware store. You can also keep your eyes open for salvaged wood. You will need to purchase a small length of screen, however. A densely woven chicken wire (1⁄4-inch) or length of fine mesh screen will work well. Chicken wire works great for herbs (and pasta.), whereas a screen (because it’s woven so tightly) is best for drying out seeds. Both materials can be purchased at your local hardware store. Ask for chicken wire or window screen.
I like a large rack so I can spread out multiple stems simulta- neously and not have them overlap. You can, of course, adjust the dimensions to fit your space.
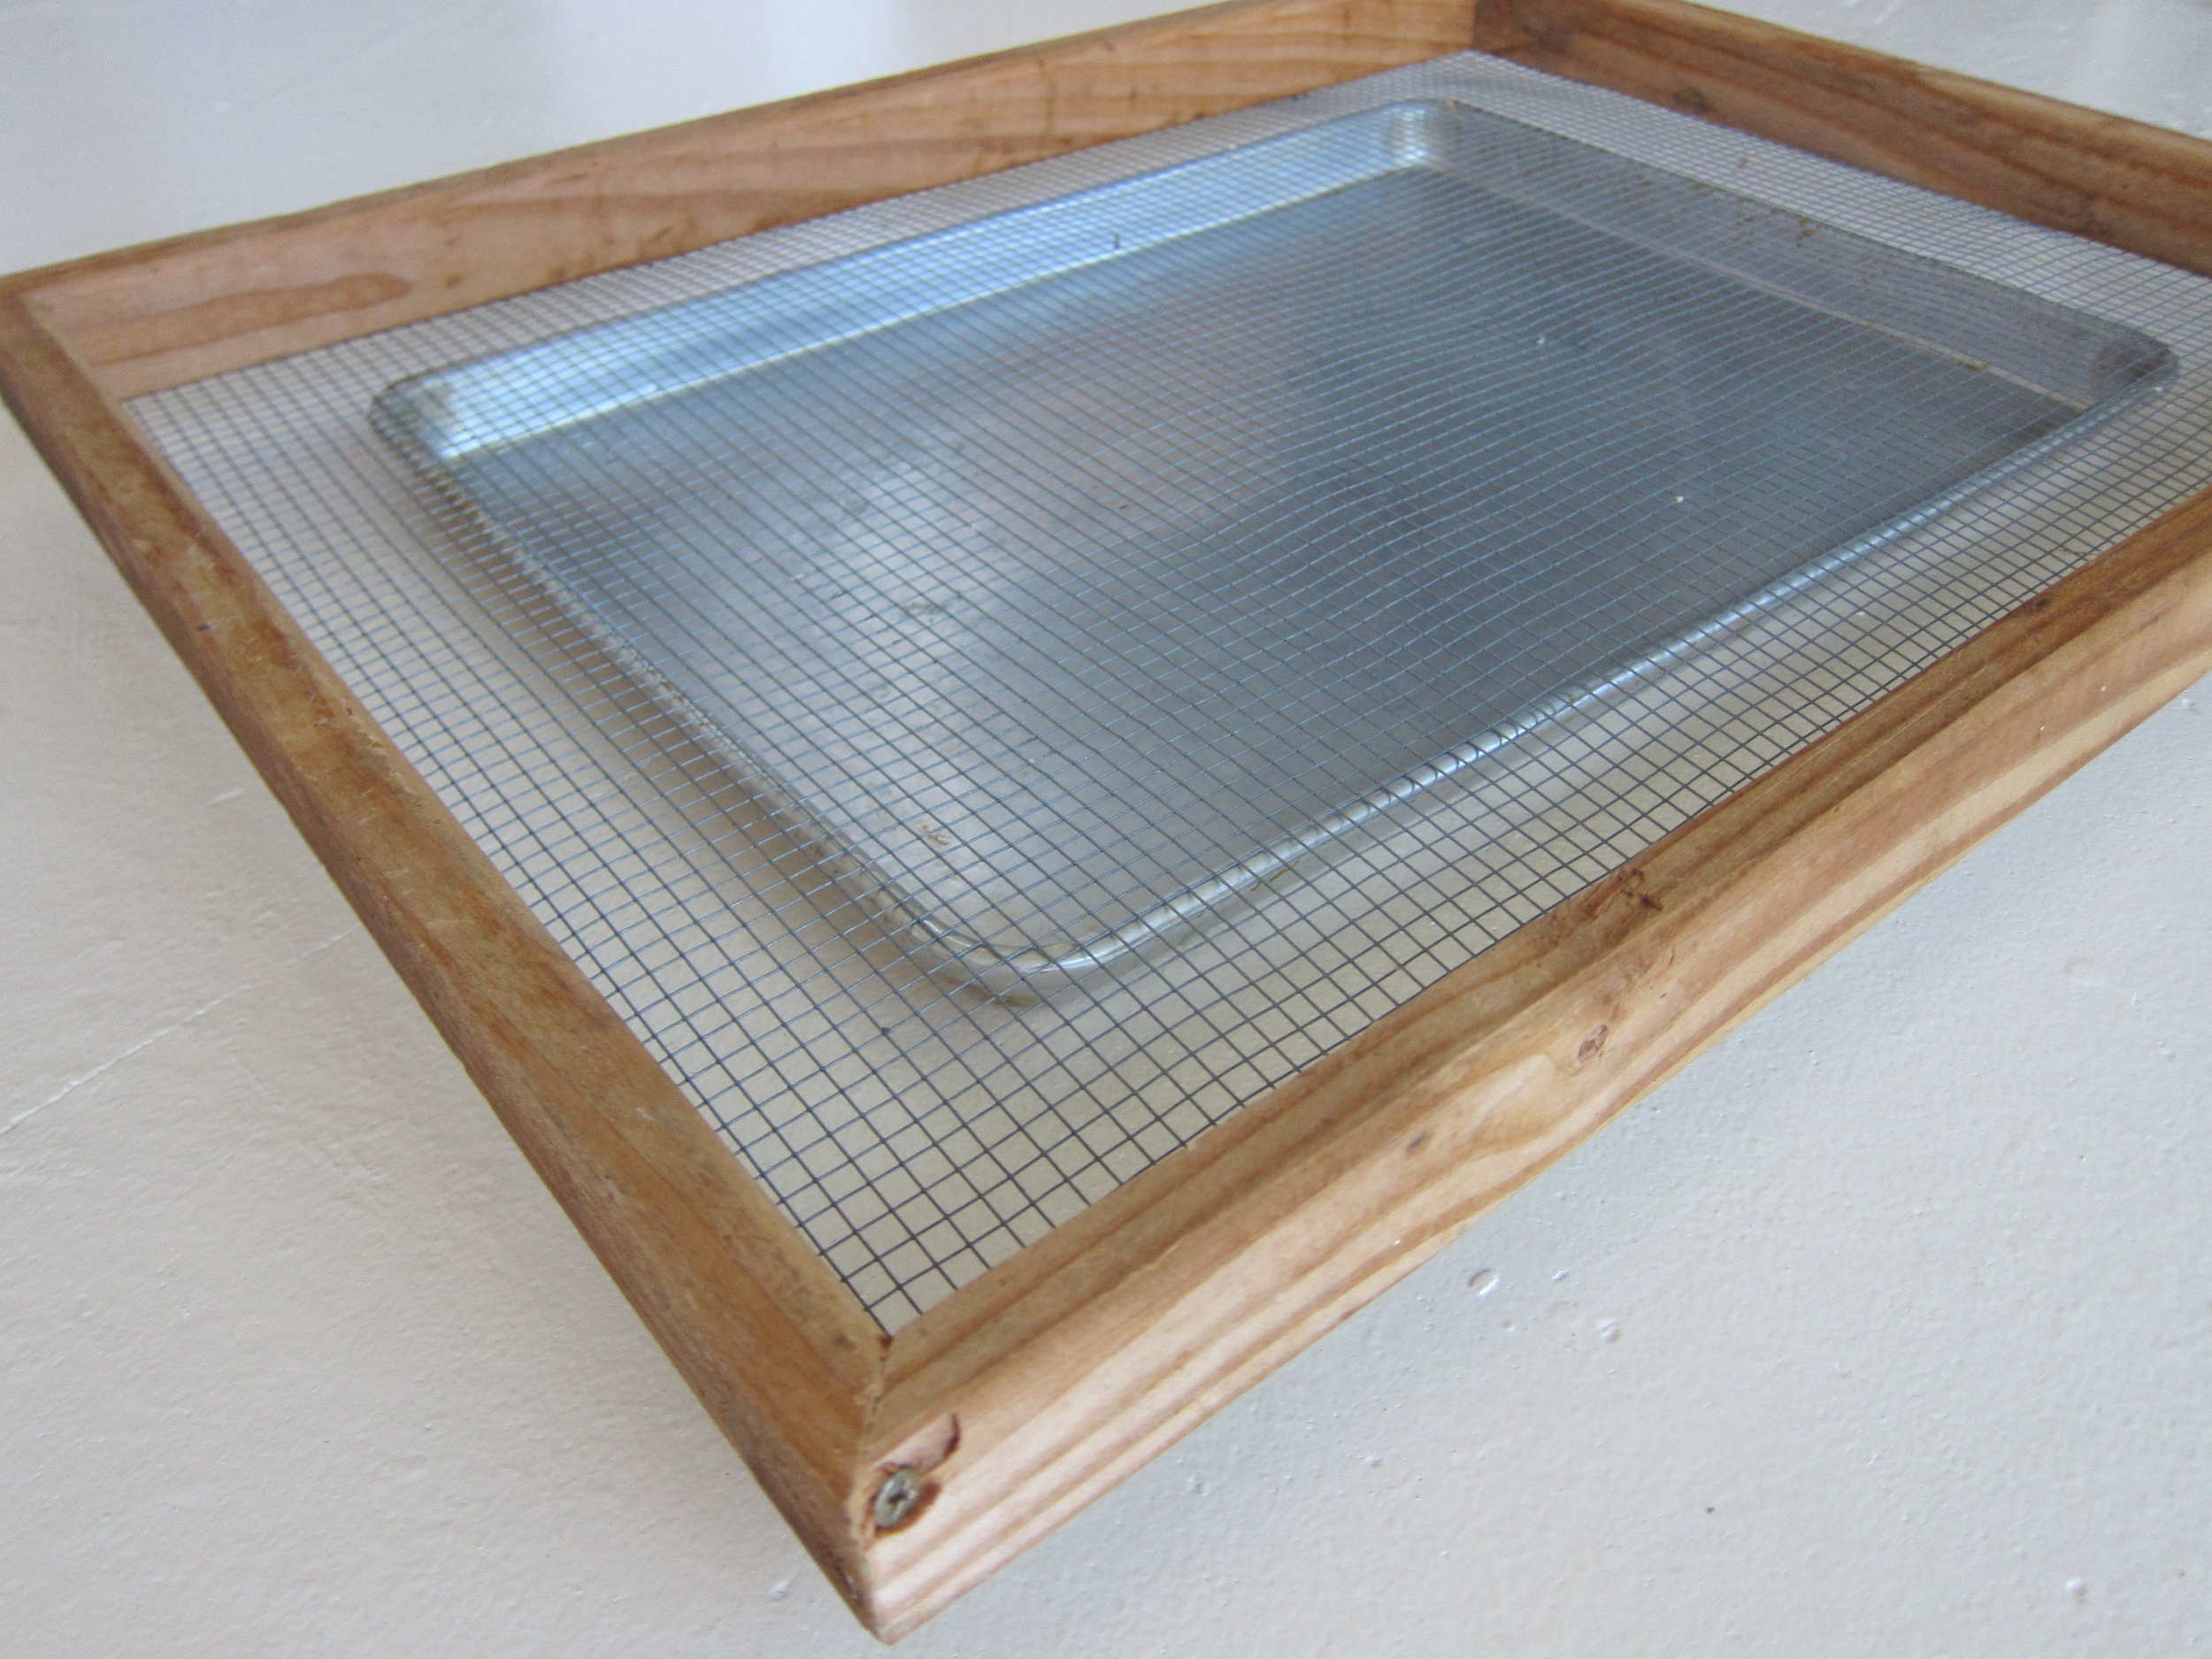
For this project you are basically building two picture frames and sandwiching chicken wire between them. The two frames will have opposing joints, which will offer more support to the overall construction.
 Materials
- Electric drill - Staple gun - Two 8-foot lengths of 1-by-2-inch furring strip—this is an untreat- ed piece of timber available at any hardware store - Eight 1.75-inch coarse-thread drywall screws - Eight 2.5-inch coarse-thread drywall screws - Chicken wire cut to 23.5 by 17.5 inches. Use a good pair of scissors and be sure that you cut rough edges from the chicken wire. You do not want any jagged edges, so cut as close as you can to the outside wire, leaving a smooth edge.
Directions
- Cut the following lengths from the furring strip using a handsaw or electric saw (you can also ask a salesperson at the hardware store to cut this for you):a. For the first frame, two 24-inch lengths of furring and two 16.5-inch lengths.b. For the second frame, two 22.5-inch lengths and two 18- inch lengths.
- Assemble the frames: take both 24-inch furring strips and stand them up so they are on their narrow edge and sitting tall. Fit both the 16.5-inch pieces in between the 24-inch pieces, completing a frame-like shape. The overall dimension of your frame will be 24 by 18 inches.
- Screw the frame together on all four corners, using the 13⁄4- inch screws. I recommend that you first drill a pilot hole, using a 3⁄32-inch drill bit. You should now have one completed rectangular frame.
- Repeat the same process using the 22.5-inch and 18-inch lengths. Make sure the 8-inch pieces are the outside pieces of your frame. (Slip the 22.5-inch pieces between the 18-inch pieces.) You will now have two frames of equal size.
- Lay the chicken wire on screen across the back of one of the frames and anchor to the back of the frame with a staple gun in several places.
- Sandwich the second frame on top of the chicken wire so the sides are stacked and perfectly even.
- Using the 2.5-inch screws, screw the two frames together; be sure to make pilot holes first. Evenly space the screws, using two on each side of the frame.
If you're not up for building anything, there are two other excellent options for a drying rack frame. One is shabby chic and will look rad. The other is the laziest version imaginable, but it will work. The shabby chic option makes use of old salvaged windows. Salvage yards have stacks of these, and they are typically pretty cheap. Choose a frame that is light and easy to lift and move around. I always opt for a brightly colored wooden frame with chipped paint. I love the look. Yes, old paint does tend to have lead in it, but you’re not collecting or using the frame in any way conducive to ingesting paint chips. If you’re genuinely concerned, it’s best to build your own. Be sure to choose a frame made of a material that can be pierced with a staple gun—no ugly metal window frames!
Über-Chic Drying Screen
You can use a salvaged window frame or a picture frame for this project. With either, remove the glass pane. (You can use as a cold frame for another garden project.) If using a picture frame, remove the cardboard backing, as well. Stretch a length of screen taut across the back of the frame, leaving an inch of overhang. Starting in one corner, staple gun the screen to the back of the frame. Be sure to continue pulling the screen taut as you work. Trim any excess screen with a pair of sturdy scissors. To use as a drying rack, set the screen on top of four blocks, bricks, books, and so on. Raising it slightly allows for proper ventilation.
Über-Lazy Drying Screen
 You can also use an old salvaged window screen. Salvaged goods depots often have these by the truckload. They are not the prettiest things, and you will need to set them up on blocks or bricks so air circulates underneath them, but they will work. If you go this route, be sure to wash your screen very, very well in hot soapy water fol- lowed by a dip in a bleach bath. Use one capful of bleach for every gallon of water. Screens used in construction are often quite dirty and may contain trace amounts of lead or other not-good-for-you ele- ments. Know, also, that these thin screens can tear easily. Patric didn’t think I should use them at all, due to their flimsiness, but they are completely functional. Just make sure not to bang them around too much. Use blocks or bricks to prop up the four corners. This allows for proper air circulation, which aids in more even drying and helps to prevent mold growing from moisture.